
OTserver Otter: Read-Only Industrial Discovery for OTserver
OTserver’s scanner is called OTserver Otter. Like an otter diving beneath the surface to retrieve what is hidden, Otter dives into the industrial network, identifies the devices living there, and brings the evidence back to the surface — straight into your OTserver inventory. The scanner lives in its own repository: github.com/ruveydac/otserver-otter. The asset-management web application is maintained at github.com/ruveydac/OTserver.
OTserver Otter is a cross-platform Rust CLI and GUI. It discovers IPv4/MAC pairs with ARP and sends fixed read-only discovery requests for PROFINET DCP, S7, EtherNet/IP, BACnet, Omron FINS, Niagara Fox, DNP3, IEC 61850, OPC UA, optional SNMP, and LLDP.
Only scan networks you own or are authorized to assess. Every manual or scheduled scan requires the explicit --ack-authorized flag.
The same GUI is available on Windows and Linux.

Windows
Windows uses native IP Helper for active ARP. Active PROFINET discovery uses separately installed Npcap; Microsoft pktmon provides a passive fallback that requires Administrator rights and cannot transmit DCP Identify. Driver installation is never a scan side effect, and no TAP adapter or Windows Network Bridge is used. Follow the Windows deployment guide to install and verify the release executable and capture backend.
| |
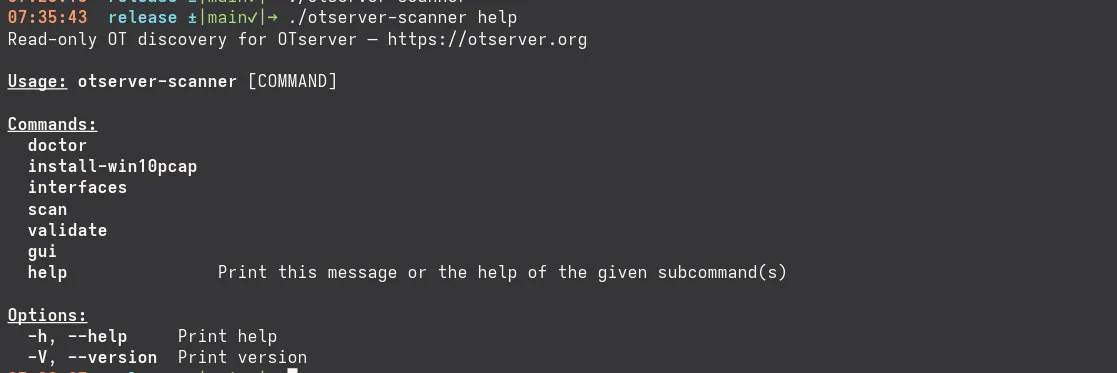
Store the complete setup in otter.json
Place otter.json beside otserver-otter.exe on Windows or the otserver-otter binary on Linux. The GUI saves changes to this file and the CLI loads it automatically, so a fully configured scan only needs:
| |
Legacy otscanner.json files are still loaded when otter.json is absent.
Example configuration:
| Setting | Purpose |
|---|---|
name | Required unique name when the file contains an array of configurations. |
targets | One or more authorized IPv4 addresses or CIDR networks to scan. |
interface | The selected network-interface name or GUID. Use interfaces to list valid values. |
sourceMac | MAC address of the selected interface, used for link-layer discovery. |
output | Destination for the validated schema-version-2 scan JSON. |
snmp | Optional SNMPv1, v2c, v3, or auto settings. Without it, Otter uses SNMPv2c with community public. |
noArp … noLldp | Per-protocol switches. false enables the protocol; set a value to true to disable it. |
noDnp3, noIec61850 | Disable DNP3/TCP attribute reads or IEC 61850 MMS discovery independently. Both default to false; CLI equivalents are --no-dnp3 and --no-iec61850. |
opcuaPorts | TCP ports probed for OPC UA discovery. Defaults to 4840, 4841, and 48400. |
opcuaUsername | Optional OPC UA username. Otter prefers anonymous access when the server offers it. |
opcuaPassword | Optional OPC UA password. |
serverUrl | Optional OTserver base URL for direct upload. |
site | Required Payload site document ID when direct upload is enabled. |
apiKey | Optional API key for direct upload. Prefer the OTSERVER_API_KEY environment variable instead. |
The root can also be an ordered array. Every entry then needs a unique, non-empty name, and every resolved output path must be unique:
The CLI runs array entries sequentially in file order and continues after an individual configuration, scan, or upload failure. The GUI can clone the selected entry with Add Configuration, then Run Selected or Run All. Stopping a GUI batch writes a valid partial export when possible and skips its remaining entries.
To upload each completed scan directly, add the destination:
Merge those fields into the main object and add apiKey, or provide OTSERVER_API_KEY to the Otter process. The API-key user needs read/write access to the selected site. The local scan file remains available if the upload fails.
Command-line values override otter.json, and OTSERVER_API_KEY overrides apiKey. Relative paths resolve from the process working directory. Keep that directory consistent when automating scans.
For safety, --ack-authorized cannot be stored in JSON. It must remain visible in every scan command, including scheduled commands.
Linux
Linux Ethernet discovery uses a native AF_PACKET raw socket and needs root or CAP_NET_RAW.
| |
Tagged releases also include a headless AArch64 build for Raspberry Pi 3, 4, 5, and Zero 2 W running 64-bit Raspberry Pi OS Bookworm or newer with libssl3. Build that CLI-only variant natively with:
| |
Safety and credentials
Otter does not perform configuration writes, SNMP SET, DCP Set, brute force, exploits, vulnerability scripts, or Modbus requests. Disable individual discovery protocols with their no* JSON settings or --no-* CLI flags when needed.
SNMP and OPC UA settings, including credentials, are stored in plaintext in otter.json and can be edited in the GUI. Keep the file out of source control and restrict its permissions, for example with chmod 600 otter.json. Credentials are never written to logs or scan exports. SNMP defaults to SNMPv2c with community public when no settings are configured. Explicit SNMPv1, v2c, and v3 selections do not fall back; opt-in auto tries usable v3 settings, then v2c, then v1 within the target timeout.
Validate and import
| |
Exit code 0 means every configuration completed, 2 means at least one valid output is partial, and 1 means a configuration, scan, validation, or upload failed. Multi-configuration runs still attempt later entries before reporting failure.
Otter can upload completed JSON through OTserver’s existing REST importer when supplied with an OTserver URL, site ID, and a user API key with read/write access to that site.
Schedule automatic scans
Only automate scans for networks your organization continuously owns or is authorized to assess. Keep --ack-authorized in the scheduled command as the explicit record of that authorization.
Windows: Task Scheduler with PowerShell
Otter runs the configured entries sequentially and exits, so use Windows Task Scheduler rather than a service wrapper. Run this PowerShell as Administrator to execute Otter every day at 02:00 under the built-in SYSTEM service account:
| |
otter.json must be beside the executable in $otterDir. -WorkingDirectory ensures its relative paths resolve consistently. Test the task and inspect its last result:
| |
Store the API key in otter.json or provide OTSERVER_API_KEY to the task’s service account. Restrict access to otter.json, which contains SNMP and OPC UA credentials when configured.
Linux: systemd service and timer
This example assumes the binary and otter.json are in /opt/otserver-otter, the service runs as otserver-otter, and the configured output path is writable by that user. Create /etc/systemd/system/otserver-otter.service:
| |
Create /etc/systemd/system/otserver-otter.timer to run it every day at 02:00 and catch up after downtime:
| |
Load, test, and enable the schedule:
| |
Optionally put OTSERVER_API_KEY in /etc/otserver-otter.env, readable only by root. Restrict otter.json, which contains configured SNMP and OPC UA credentials. Use an absolute writable output path in the Linux config, such as /var/lib/otserver-otter/scan.otserver.json.
Source code
OTserver Otter and the canonical otserver-scan export contract are developed in the open:
- OTserver Otter (scanner): github.com/ruveydac/otserver-otter
- OTserver (asset-management application): github.com/ruveydac/OTserver
Set up the OTserver manager before importing your first scan.